


- Recipe Index

- Photography
- Photography 101
Photography 101

Photography 101 Overview:
There are three fundamentals to photography that every photographer should know. These are ISO, shutter speed, and aperture.
Shutter speed is the length of time your camera’s shutter is open to light. Each time you hear your camera click when taking a picture? That’s the shutter opening and closing. Shutter speed is denoted by a fraction of a second.
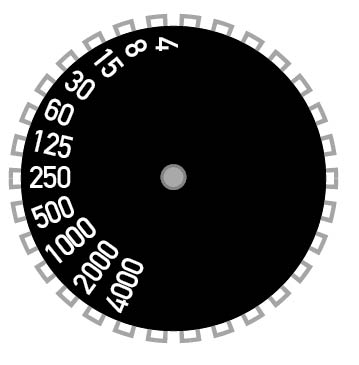
As shutter speed increases, sensitivity to light decreases
1/30 sec > 1/200 sec
where > denotes more sensitive
In settings with more light, faster shutter speeds are possible because more light is streaming through the lens. Conversely, in settings with less light, slower shutter speeds are necessary because less light is streaming through the lens.
Aperture is the hole through which light travels from the lens to your image sensor. A camera’s aperture can be large or small, depending on how much light you want to let in. The larger the aperture, the more light let in. Aperture is denoted by f / [number] and can also be called your f-stop.
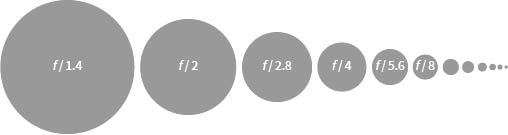
As aperture increases, sensitivity to light decreases
f / 1.4 > f / 16
where > denotes more sensitive
The important thing to remember here is that f/1.4 is considered a large aperture because the opening itself is larger, while f/16 is considered small because the opening is smaller. In settings with more light, a large aperture is not as necessary, as there is a lot of light streaming through the lens. Conversely, in settings with less light, a large aperture is more necessary because less light is streaming through the lens.
ISO is your camera’s sensitivity to light. More specifically, in analog (traditional) cameras, it is the film’s sensitivity to light, while in digital cameras it is the image sensor’s sensitivity to light.
 As ISO increases, sensitivity to light increases
ISO 200 < ISO 1600
where < denotes less sensitive
In settings with more light, a lower ISO will work best, as there is enough light streaming through the lens that the ISO can capture enough light. Conversely, in settings with less light, a higher ISO may be necessary because less light is streaming through the lens, and the ISO will need to be more sensitive to light.
ISO and its qualities
So! How are we doing so far? A little confused? Not to worry. Let’s explain things using pictures. Turn up the brightness on your screen all the way to be able to see the differences best!
The two main things to know about ISO are that they change the image sensor’s sensitivity to light, and they effect the noise and tonal quality of the photograph. Below are two photos of the same object taken at two different ISOs. Both pictures were exposed to the same amount of light, but using two different ways.
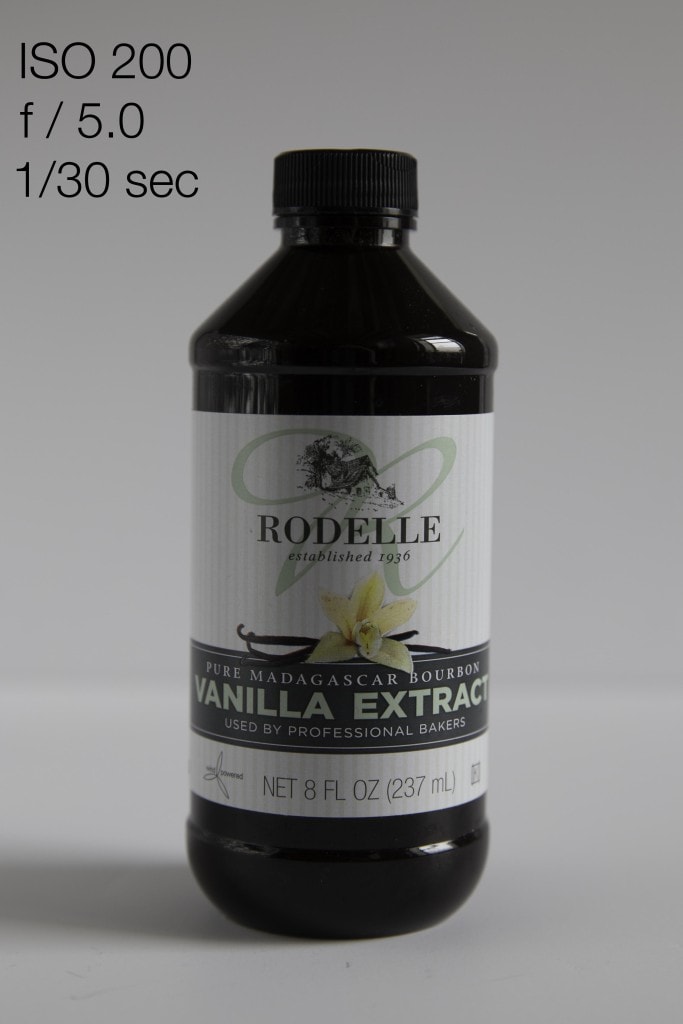
The photo on the left we will call ISO 200, as this picture was taken at ISO 200. As we learned above, this is an ISO that is less sensitive to light. Because of this, we needed to expose the image sensor to more light. We did so using a longer shutter speed of 1/30 sec.
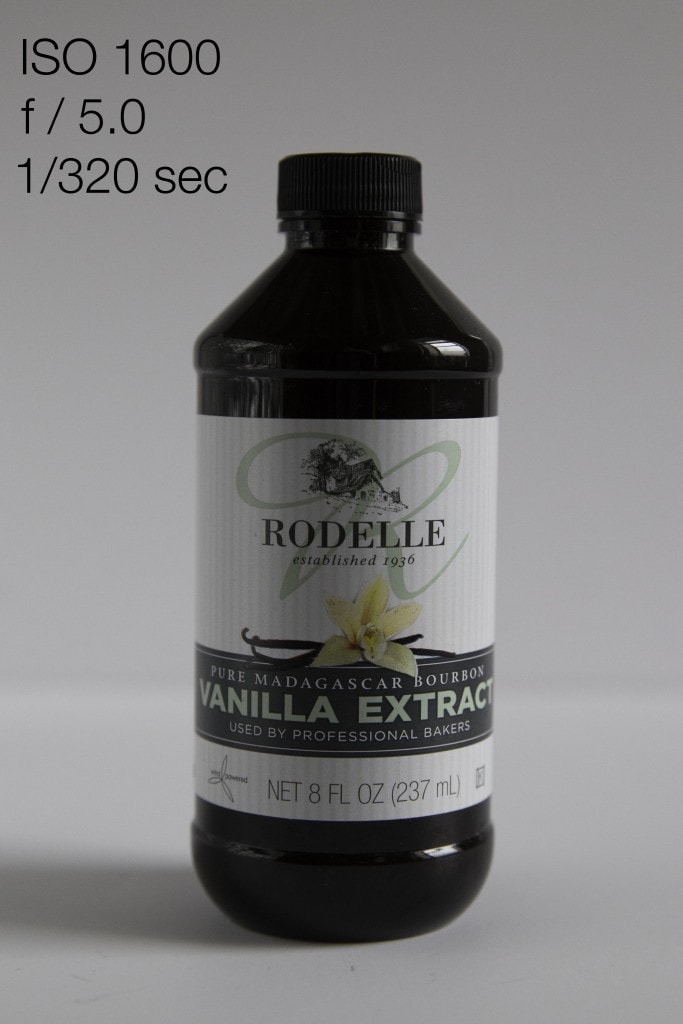
Conversely, the picture on the right we will call ISO 1600, as it was taken at ISO 1600. This is an ISO that is more sensitive to light. Because of this, we didn’t need to expose the image sensor to the same amount of light as the picture on the left. In fact, if we had done that, the image would’ve looked like this:
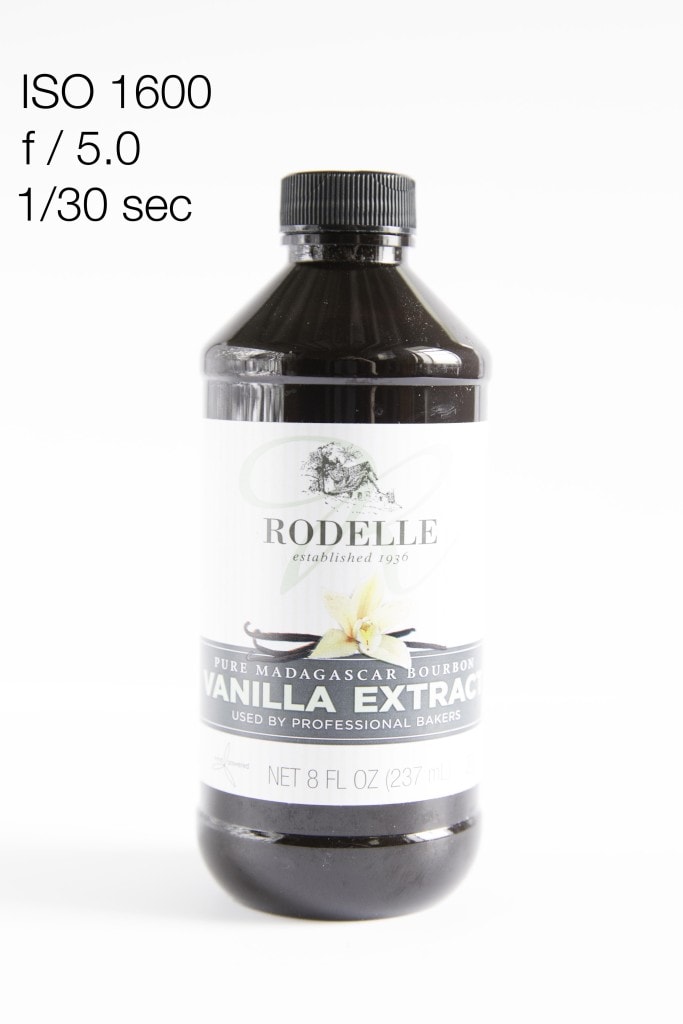
So instead, we exposed the image sensor to less light at a quicker shutter speed of 1/320 sec to produce an image nearly identical to the first. The thing is, the two images aren’t completely identical. One thing to consider when using a higher ISO is noise. Noise is any visual distortion that takes place in a photograph. Noise increases as both ISO increases and as light decreases.
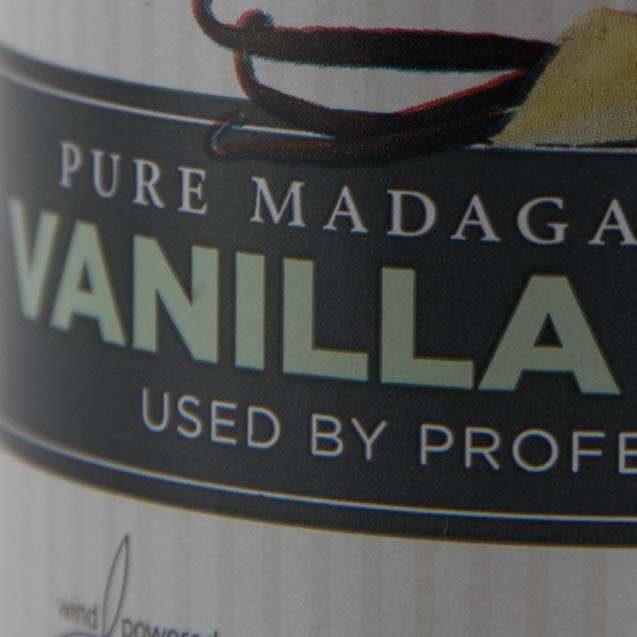
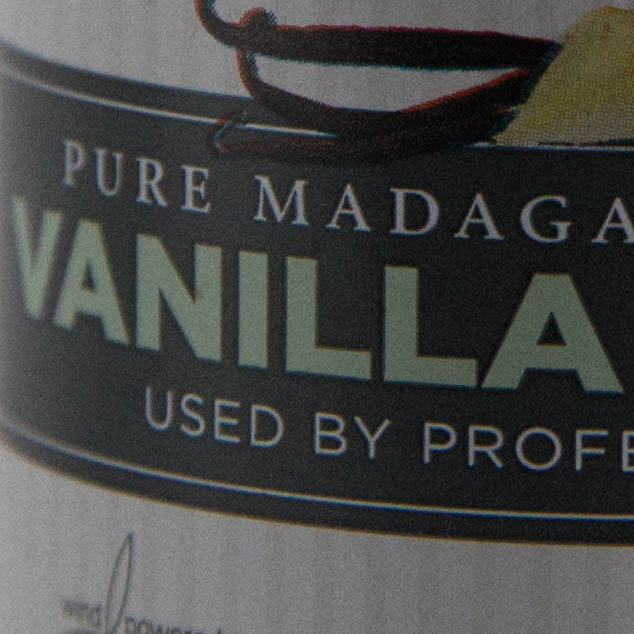
Here are our two photos up close. ISO 200 is on the left. Can you see that it looks a lot smoother than ISO 1600, which looks more grainy? That’s noise. This is something to consider when shooting at higher ISOs. Even though the image sensor becomes more sensitive to light, the image quality may suffer. I typically shoot between ISO 100 – ISO 800 to avoid any visible noise.
Another difference between the two photos is their contrast. ISO 200 has less contrast overall, and also more tonal variation (difference in the lightness and darkness of a color or area). ISO 1600, has more contrast (the whites are whiter and the blacks are blacker), and therefore less tonal variation.
This comparison is small, but still noticeable. Places you can see it the most are in the background surrounding the cap and on the bottle itself. The background surrounding the cap in ISO 1600 looks like it’s completely one grey tone, while there is some slight color variation in the background of ISO 200. The right side of the bottle in ISO 1600 looks whiter than the right side of the bottle in ISO 200. And the left side of the bottle of ISO 1600 looks like a flatter grey than that in ISO 200, which, again, has more tonal variation.
Aperture and shutter speed
Wow! That’s a lot of learning. Ready for the next part? The important thing to know about aperture and shutter speed is that they work together in different ways to produce a well-exposed image. In well-lit situations, larger apertures require faster shutter speeds, and smaller apertures require longer shutter speeds.
Below are three photos of the same object taken at three different apertures. All pictures were exposed to the same amount of light (relatively, sorry they’re a bit off) using the same ISO (ISO 400), but using three different apertures and shutter speeds.
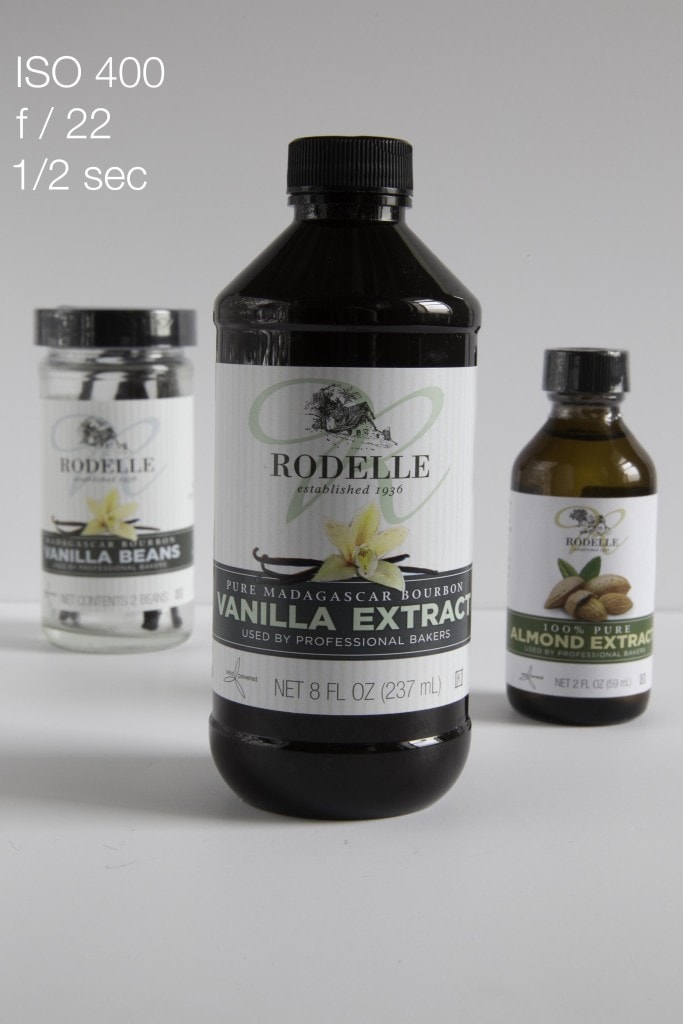
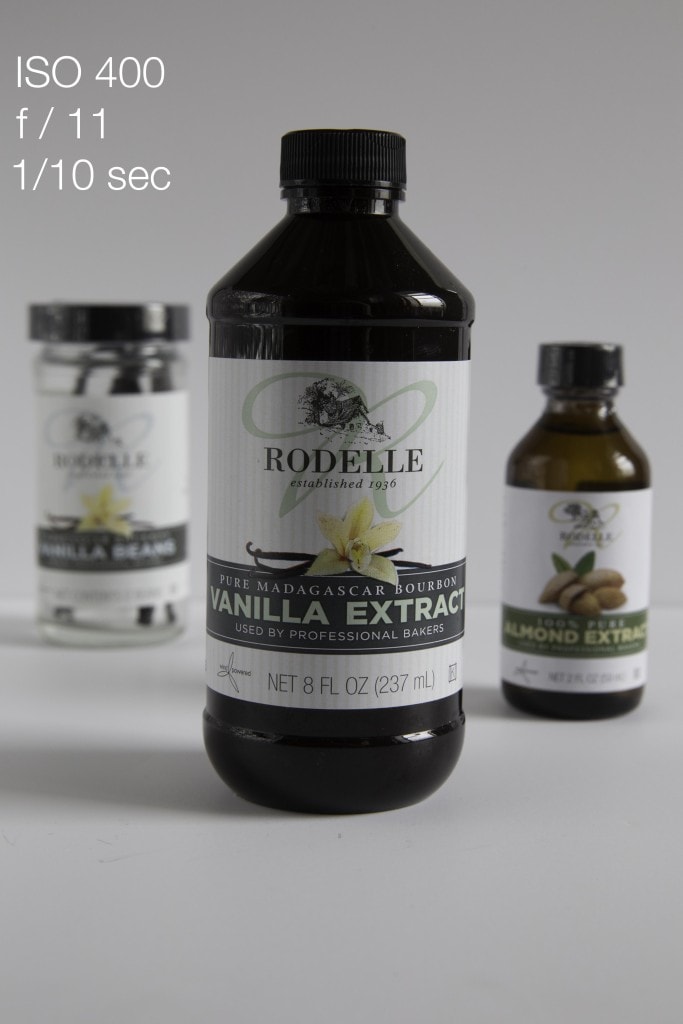
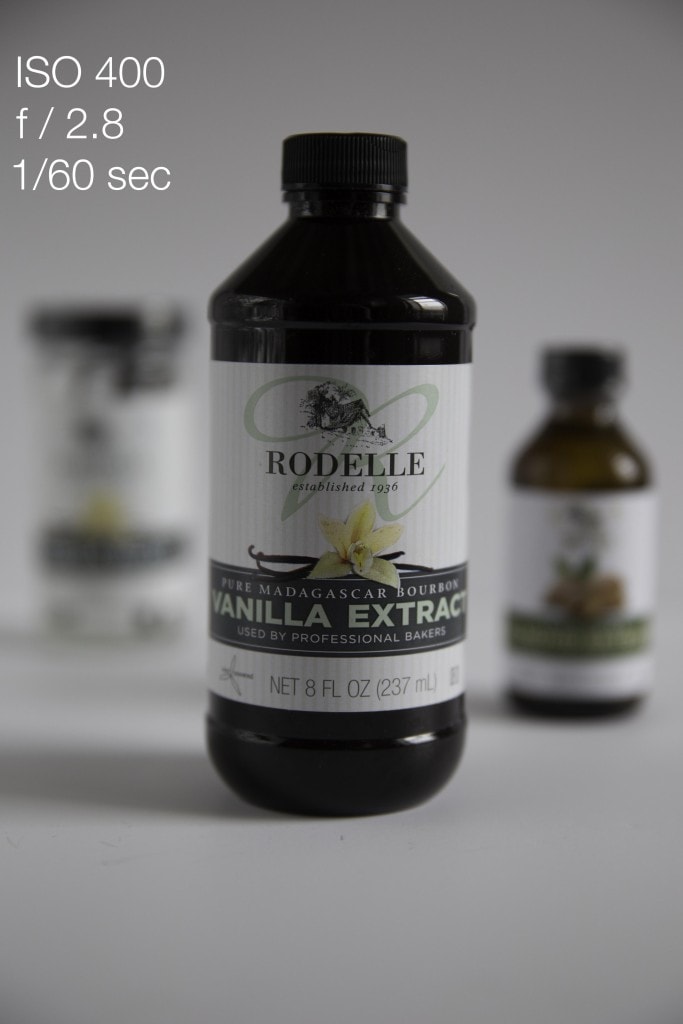
As you can see, as your aperture gets larger in size, not only does your shutter speed increase, but your blur increases as well. This blurring is known as depth of field. The photo on the left has a wide depth of field, while the photo on the right has a shallow depth of field.
If you want images with beautiful blurs in the background, you should aim to shoot at f/2.8 – f/5.6. If you want a sharper image where the foreground and the background are both clearly visible, choose an f-stop of 8 or higher.
What does all this mean?
Now that you’ve learned the basics, let’s put this into practice.
When you shoot food, you’ll typically want to be shooting between ISO 100-800. This will allow you to shoot in multiple light situations while giving you a great quality image. Once set, you won’t need to change your ISO unless the light drastically changes. So, pick your ISO (100 for very bright space, 800 for darker space, and 200 and 400 for everything in between) and call it a day!
You will, however, be constantly changing your shutter speed and aperture. No more shooting in Automatic or P, people. We’re going straight to manual.
This helps for multiple reasons. First, you will be deciding the amount of light let into your image, not some sensor inside your camera. This will make your editing life much easier, as you’re taking a sort of preliminary step towards editing your picture. You choose if your image is moody and darker or bright and lighter with the click of a button.
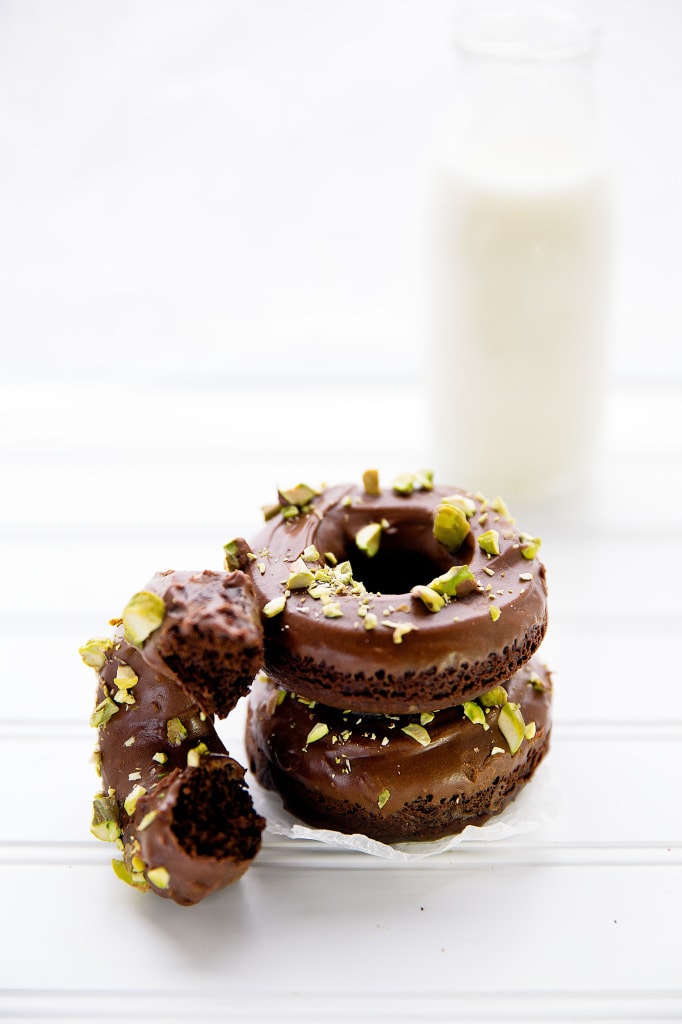
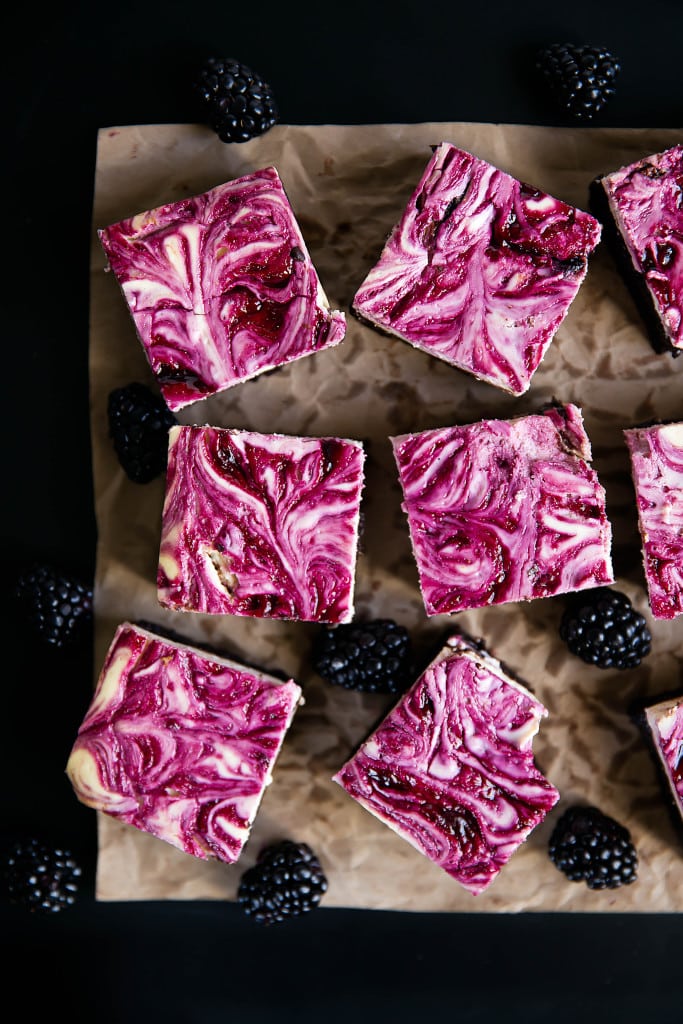
Sometimes an overexposed image is key for a photograph, like in the double chocolate donuts on the left, whereas sometimes an underexposed image leads to a rich and bold photo, like the blackberry cheesecake brownies on the right. Neither of these images would have had the same effect if they were taken on an automatic setting.
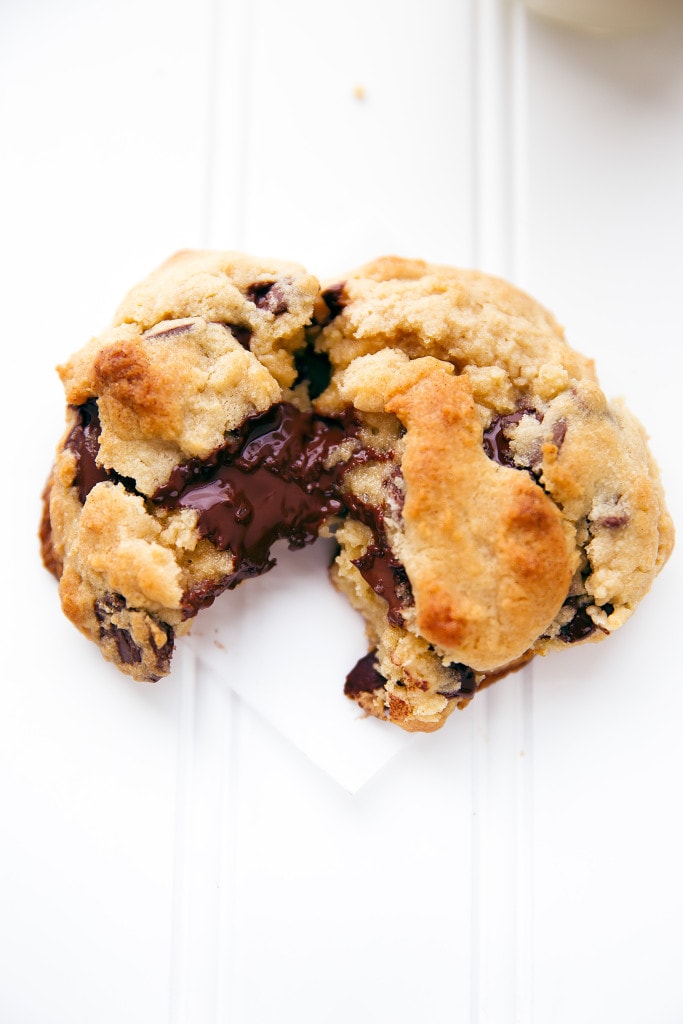
You also end up with what you want in focus and what you want blurry. Do you remember how? By using a large aperture (< f/5.6). This photo of my Copycat Levain Chocolate Chip Cookies was shot at f/3.2, a very large aperture with a small depth of field. This means that what you choose to have in focus stands out. Both the front and back of the cookie aren’t fully focused, so your eye is drawn to the in-focused melted chocolate in the middle.
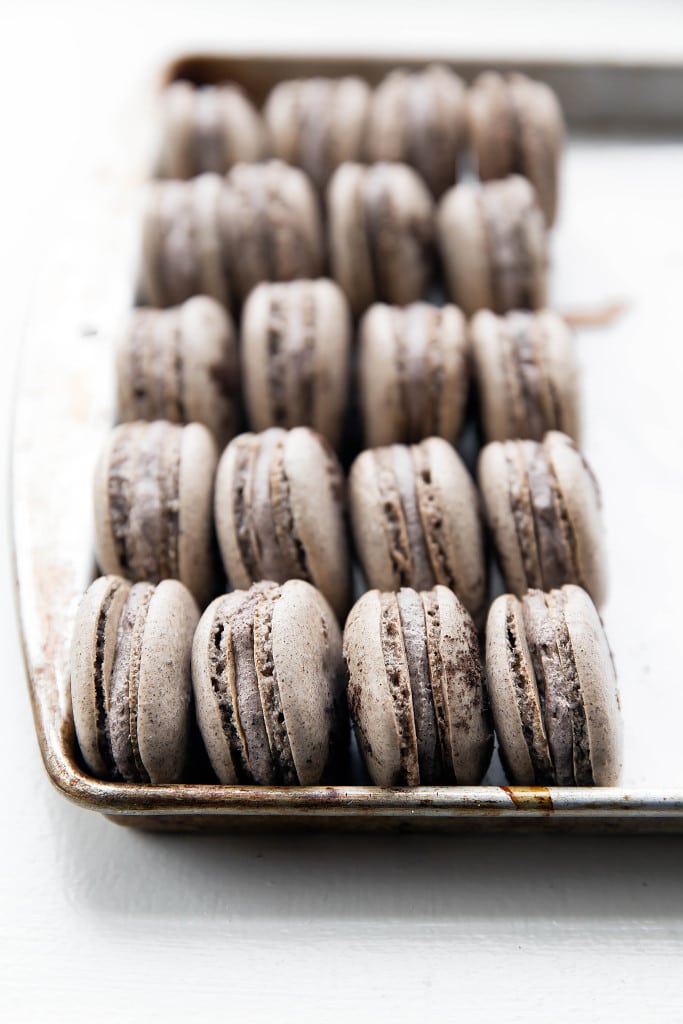
So when I shoot, I first set my ISO. Done. I’ll then choose an aperture between f/2.8 – 5.6. I’ll shoot closer to f/2.8 if I’m doing an overhead shot or one where my subjects are all on the same plane. I’ll move closer to f/4 or f/5.6 if I’m photographing from an angle, like in the photo of cookies and cream macarons above. I do this because I find the blur on f/2.8 can be too harsh for an angled shot. The above photo was taken at f/4, giving a great blur into the background, but not so blurry that you you can’t make out the second row of macarons.
Once you set your aperture, it’s just a matter of twiddling your finger to alter the shutter speed shot by shot. Move your camera one way and the photo becomes overexposed? Shorten your shutter speed and click! Photo done. Want to perfectly expose the darks of your brownies? Longer shutter speed, click-boom-photo!
You’re probably thinking ain’t nobody got time for that, but I want you to remember that all you’re doing is adjusting one nob before you take your photo. Then every 10 images or so, you may adjust your aperture, too, and before you know it you have an entire set of perfectly exposed photographs.
Most of what you’ve learned on this page is a foundation so you can understand what to do in taking a photo. In practice, there are very few steps to take. Plus in a matter of weeks you won’t even realize you’re doing it. And you’ll end up with a much better image every single time. I guarantee it.
More photography tips from Broma Bakery:
6 Ways to Curate the Perfect Instagram Feed
8 Ways to Instantly Improve Your Restaurant Photography
Free Photoshop Actions fo Food Photography!
Cool Sarah 🙂 Thnx 4 the tips 😀
So good and detailed. I am learning so much.
Thank you!
[…] photography is mouth-watering and her eye for subtle detail is well developed. She hasseveral tutorialsfor budding food photogs, and her skill behind the lens gives her advice much credence. The recipes […]