


- Recipe Index

- Desserts
- Cakes & Cupcakes
- Samoa Cake
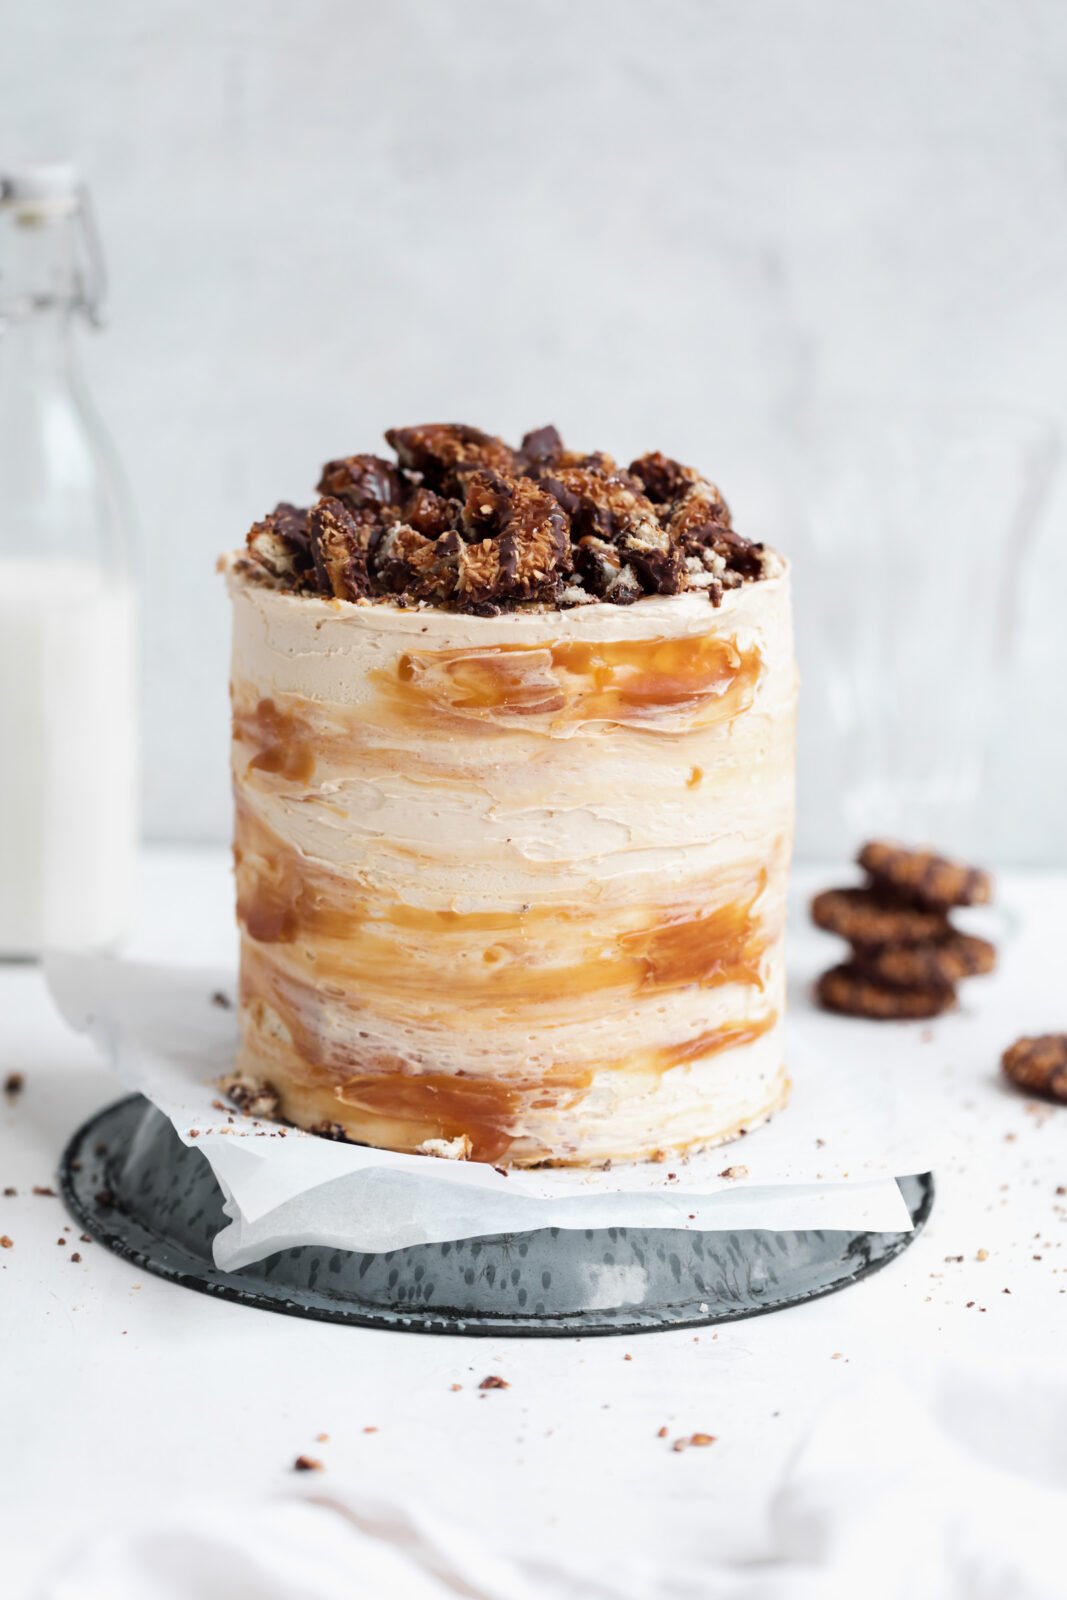
Samoa Cake
It’s girl scout cookie season all year long with this samoa cake AKA the best salted caramel coconut chocolate cake you’ll ever have. This decadent chocolate cake is layered with a coconut caramel filling and held together with a dreamy caramel buttercream. YUM.
Samoa Cake
I regret to inform you that girl scout cookie season is coming to an end. But if I had it my way this would not be a season. It would be a lifestyle. I would be pounding thin mints, samoas, and tagalongs all year long. And I think we can all agree that samoas are either the best (or second best type if you’re a thin mint human) of girl scout cookie you can get. Luckily, you can enjoy all those scrumptious flavors of a classic samoa with this decadent samoa cake.
What is samoa cake?
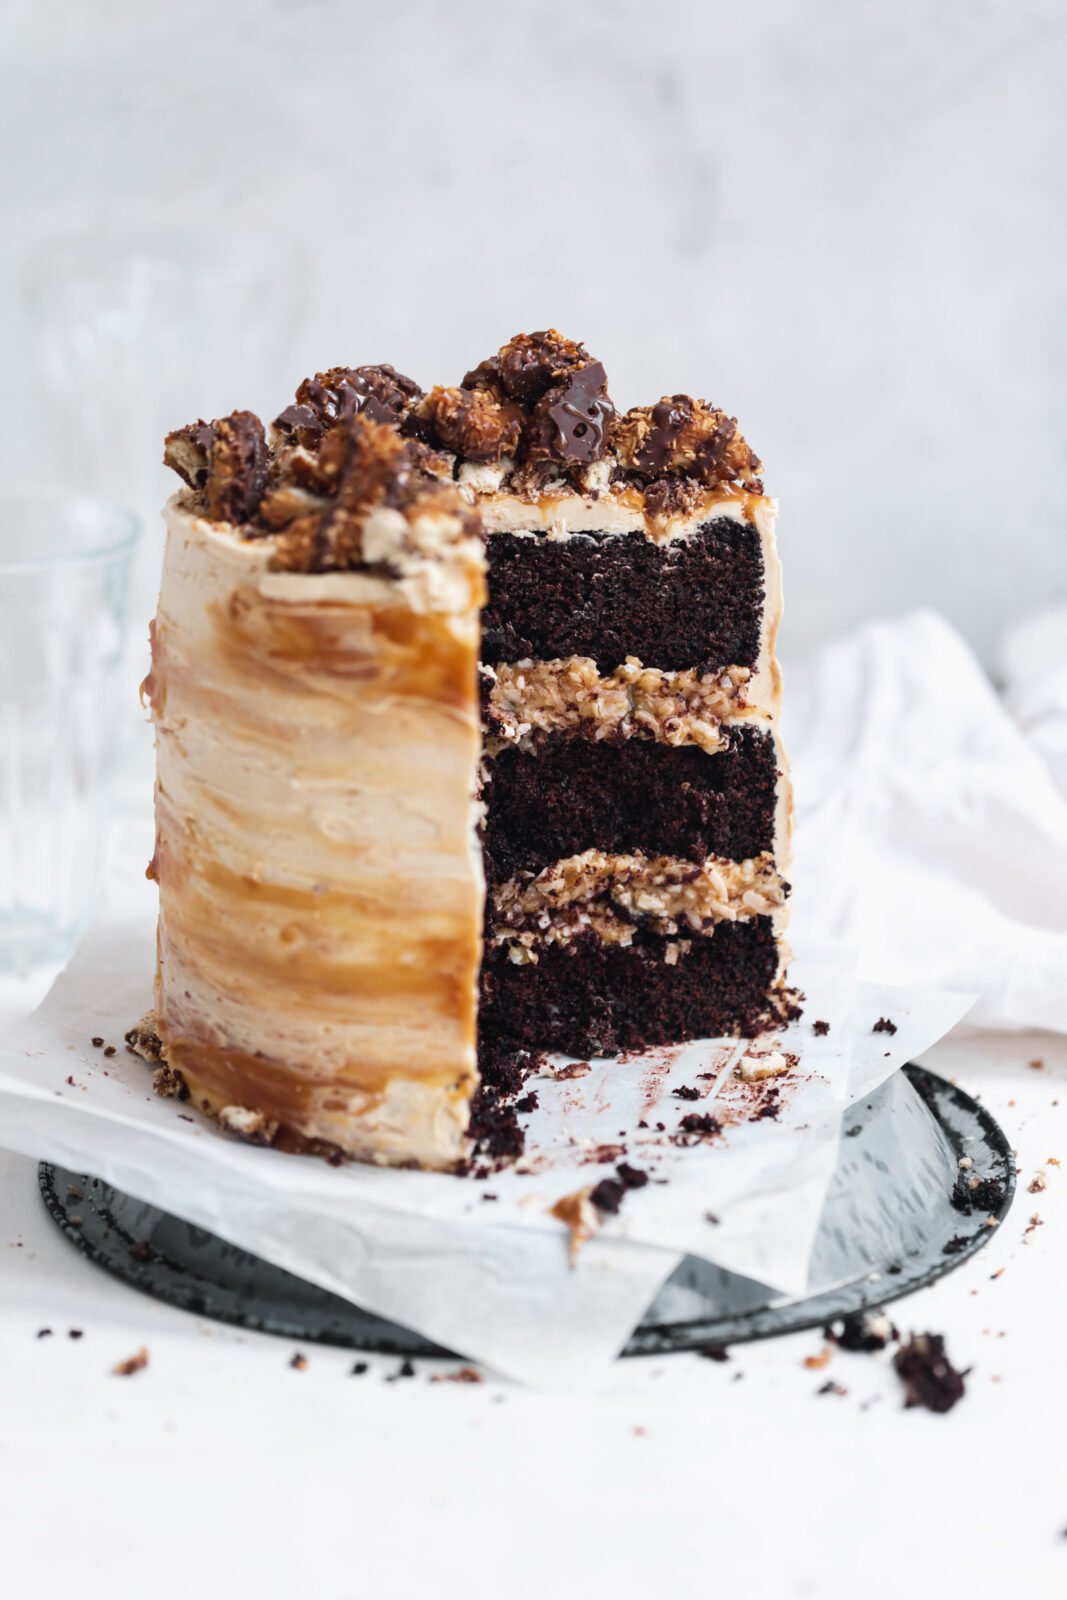
Ermahgerd. Let me tell you. This girl scout cookie cake is super chocolatey, salty-sweet, and a serious showstopper. This samoa cake consists of three scrumptious components:
- Super moist and fudgy chocolate cake.
- Salty-sweet caramel coconut filling.
- Dreamy caramel buttercream swirled with more caramel.
Okay, well I guess there is a 4th layer of crushed up samoa cookies on top, but that required zero effort and is technically optional (although, I strongly recommend it).
Samoa Cake Ingredients
Okay, so don’t be alarmed, but this decadent chocolate cake requires its fair share of ingredients. And a bit of extra work. But, boy oh boy, is it worth it! Here’s what you’ll need:
- Granulated Sugar
- Cocoa Powder
- All Purpose Flour
- Baking Soda
- Baking Powder
- Vegetable Oil
- Vanilla Extract
- Eggs
- Buttermilk
- Strongly Brewed Coffee
- Salt
- Homemade Caramel
- Sweetened Shredded Coconut
- Powdered Sugar
- Unsalted Butter
Phew! I know it sounds like a ton of ingredients, but most of them are basic ingredients you probably already have hanging around in your pantry, so don’t let this list scare you off.
How to prep samoa cake ahead of time:
It’s no secret that layer cakes can be a bit of an undertaking. You have to make the cake, the filling, the frosting AND you have to assemble it all. Sometimes a day long baking project can be fun, but other times it can feel like a drag. The wonderful thing about this samoa cake is that you can parse it out into smaller projects so that it doesn’t feel like so much all at once.
- Bake the cake aheads ahead of time and freeze them. This is my favorite way to make homemade layer cakes. Freezing your cakes will break up the work and chilled cakes are also much easier to work with! Bake your cakes, allow them to cool completely and then wrap in plastic wrap. Place in the freezer and use whenever you need!
- Make the caramel up to 3 weeks in advance. Like the chocolate cake, you can also make the caramel ahead of time. Caramel can be stored for up to 3 weeks in your fridge in an airtight container, so feel free to make it whenever you have the chance so you always have it on hand. If this is your first time making caramel, or if you want to brush up on your caramel skills, take a peak at our detailed tutorial on how to make homemade caramel.
Happy baking, my loves!
XXX
PrintSamoa Cake

- Prep Time 30 minutes
- Cook Time 30 minutes
- Total Time 2 hours
- Yield 16 servings
- Category dessert
- Method oven
- Cuisine american
Samoa Cake
It’s girl scout cookie season all year long with this samoa cake AKA the best salted caramel coconut chocolate cake you’ll ever have. This decadent chocolate cake is layered with a coconut caramel filling and held together with a dreamy caramel buttercream. YUM.
- Prep Time 30 minutes
- Cook Time 30 minutes
- Total Time 2 hours
- Yield 16 servings
- Category dessert
- Method oven
- Cuisine american
Ingredients
for the chocolate cake
- 1 3/4 cups granulated sugar
- 3/4 cups dutch processed cocoa powder
- 2 cups flour
- 1 1/2 teaspoon baking soda
- 2 teaspoons baking powder
- 1 teaspoon salt
- 3/4 cup vegetable oil
- 3 large eggs
- 1 cup buttermilk
- 1/2 cup strongly brewed coffee
for the homemade caramel
- 1 cup granulated sugar
- 6 tablespoons unsalted butter, room temperature
- 1/2 cup cream
- 1/2 teaspoon salt
for the caramel coconut filling
- 1/2 cup homemade caramel (recipe above)
- 1 1/2 cups sweetened shredded coconut
for the caramel buttercream
- 1/2 cup caramel, divided
- 1 cup unsalted butter, room temperature
- 1 teaspoon vanilla extract
- 1 1/2 cups powdered sugar
- pinch of salt
- 10 samoa cookies, optional
Instructions
- Preheat oven to 350°F. Grease and line three 6-inch cake pans* with parchment paper.
- In a large bowl, whisk together sugar, cocoa powder, flour, baking soda, baking powder, and salt. In a separate bowl, whisk oil, eggs, and buttermilk.
- Pour the wet ingredients into the dry, whisking until no lumps remain. Pour in brewed coffee, mixing until just combined.
- Pour batter into prepared pans and bake for roughly 30 minutes, or until a knife inserted in the center of the cake comes out clean. Transfer to a wire rack to cool.
- While the cakes cool, make the homemade caramel. In a heavy bottomed sauce pan, heat the granulated sugar on medium low heat until its completely melted, swirling the pan gently every 20 seconds or so. The sugar will start to form clumps before melting slowly. Be patient and keep an eye on it to make sure it does not burn.
- Once melted, remove from heat immediately and stir in the butter. The mixture will violently bubble. You’re doing it right. Next, pour in the heavy cream and 1/2 teaspoon of the sea salt. Stir until everything is combined. Taste a spoonful of cooled caramel. If it needs more salt, feel free to adjust to taste.
- Pour 1/2 cup of the caramel into a medium mixing bowl with the shredded coconut. Stir to combine. Set the other 1/2 cup of caramel aside to use for the frosting. Make sure that you let your caramel cool completely before using in the frosting.
- Next, make the frosting. Place the room temperature butter, vanilla, powdered sugar, salt and 1/4 cup (you will use the last 1/4 cup of it to decorate the outside of the cake) of the remaining homemade caramel in a stand mixer fit with the whisk attachment. Beat on medium speed, gradually increasing to high. Beat until light and fluffy, about 1 to 2 minutes. Place the frosting in a large piping bag.
- Once the cakes are completely cooled, assemble the layer cake. Place the first cake layer onto a cake stand. Pipe a border around the first cake layer. This will work as a barrier to hold in the caramel coconut filling. Spoon 1/2 of the coconut filling onto the first cake layer, using a spoon or an offset spatula to spread it evenly over the cake. Place the second cake layer on top, and repeat with the remaining filling. Place the final layer on top. Use the remaining frosting to frost sides and top of the cake. If desired, top the cake with roughly chopped samoas cookies. Last, take the remaining 1/4 cup of caramel and use an offset spatula to add accent of caramel around the edges of the cake and drizzle over the samoas on top. Devour!
for the chocolate cake
Notes
- You can also make this cake as a 2 layer 8 inch cake! Simply divide the batter between 2 8 inch pans and only use one layer of coconut caramel filling.
- Prep Time 30 minutes
- Cook Time 30 minutes
- Total Time 2 hours
- Yield 16 servings
- Category dessert
- Method oven
- Cuisine american
I just made this cake for my husband’s birthday and it turned out delicious. Here are some things I liked and didn’t like about the recipe:
Pros:
– Flavor combination and similarity to the actual Girl Scout cookie.
– The homemade caramel recipe was extremely helpful and so delicious. However, my caramel clumped after adding the cream, even though it was at room temperature.
– The tips on how to make this cake ahead of time was super helpful. I would’ve definitely spent much longer in the kitchen if I didn’t make the sponge and caramel ahead of time.
Cons:
– The chocolate cake was delicious but very difficult to level and work with since it was so fudgy. Note- my cake was frozen while I assembled and it was still challenging.
– The recipe did not yield near enough icing as I needed. I increased the amount by a quarter (based on other reviews) and it still wasn’t enough. I ended up making a basic vanilla buttercream to finish off the rest of my crumb coat and final coat. Also, I think it’s important to note that the addition of caramel to the buttercream will make it stiffer to work with.
– The coconut caramel mixture was delicious, however, it made slicing the cake very difficult. The mixture was so chewy that it clumped together while cutting the cake. Not the most visually appealing result. I also opted for unsweetened coconut. The final result of the cake was close to being cloying sweet, so I’m glad I didn’t follow that part of the recipe.
Best cake recipe
Made this cake and really enjoyed it. Next time, I would double the amount of caramel that the recipe calls for (you’ll be lucky if you don’t eat most of it before applying to the cake…SO GOOD), and I would make a little extra icing. I was a little short on icing for the top and sides of the cake, and it would have been nice to have a little more caramel to drizzle over the top. Nice moist cake with good flavor. The caramel was to die for. It took a lot longer than 15 minutes for me to melt the sugar down. I might also add a little more coconut/caramel filling in between each layer of cake, or make my 6 in cake layers a little shorter so the icing and filling are proportional to the amount of cake. Must add crumbled samoa cookies on top for an awesome crunch factor! Great overall, just some minor tweaks I would make next time.